Matrix Multiplication using WebGL2
Let's start with some background on what we are dealing with here. If you are already familiar with webgl, you can skip the Introduction section to some real code.
Also, disclaimer, I wrote this blog because I could not find any good resources for the same, so learned to do it myself. I am a beginner to WebGL, so this blog is more like a personal note on things I have learned.
Introduction
Fundamental to any deep learning system is the ability to multiply two matrices, and to do it quickly and efficiently. GPUs are great at doing just that. They specialize in doing one thing at a large scale, using an architecture called Single Instruction, Multiple Threads, leveraging their many cores and threads. These features of the GPU enable them to process large amounts of data efficiently.
So what is a GPU?
Graphics Processing Units or GPUs were originally designed to perform efficient computer graphics and image processing. Later, it was realized that their design makes them appropriate tools for training neural networks, so currently in the market, some GPUs are optimized to utilize their computing capabilities.
What is WebGL?
WebGL(Web Graphics Library) is a Javascript API for writing interactive 2D/3D graphics in the browser, leveraging the capabilities of the GPU. So, WebGL is not designed to perform general mathematical operations, so there will be boilerplate stuff that we have to deal with to reach our end goal. WebGL2 is a major update from the previous WebGL 1.0 that adds additional capabilities to the users, few of those features are very useful to us as well, which we will later see.
From now on, WebGL will be stylized as webgl, and matrix multiplication will be shortened to matmul. So, let's start implementing our matmul code.
We will be using a wrapper library over webgl called twgl.js to reduce the boilerplate code since webgl code can be lengthy and tedious. I will try to keep the code simple and stick to our orignal goal.
Clearing the ground, for the real stuff
To keep things simple, we will be writing the entire code inside the HTML file. Since we will be using twgl.js, go ahead and get that from their github repo. We will only be using the twgl-full.module.js file from it which is inside the dist/5.x/ folder, you can copy that file to the current working directory.
Create an index.html file, which will only contain our script.
So your index.html should look something like this at this moment:
<!DOCTYPE html>
<html>
  <body>
  <script type="module">
    import * as twgl from 'twgl-full.module.js';
  </script>
  </body>
</html>
To actually use webgl, we would have to get a render context from the canvas element.
const canvas = document.createElement("canvas");
const gl = canvas.getContext("webgl2");
Writing code for the GPU
Since the GPU is a separate piece of hardware on the computer, writing code for the GPU is not the same as writing code for the CPU. GPU have their own processor and memory. To utilize them, you have to write programs called shaders. In webgl, shaders are written in a C-like language called GLSL.
Rendering pipeline
Since webgl was designed for rendering graphics, we have to write pairs of programs, called vertex shader and fragment shader. In webgl, the set of these shaders is called a program.
The vertex shader is used to process and compute the vertex positions of a shape and the fragment shader computes the color of each pixel of the shape that is being drawn.
To understand what is happening, take a look at this figure that shows the operations that are performed by webgl to render graphics on our screen:

In the end, what webgl is doing is calculating colors for each pixel on a 2D space. In webgl, what we render to is called framebuffer.
Another thing we should know about before we go on ahead is a texture. A texture is a 2D image, that is generally used to add detail to objects. These textures can also be used to store arbitrary data and the entire texture can be easily accessed by our shaders.
The real stuff
From what we have learned, we have answered a very important question: How will we be storing our matrices in the GPU?
We will be utilizing the following features of webgl2: 1. We can use textures to store arbitrary data. 2. Texture can be easily accessed by our shaders. 3. We can render to a texture using a framebuffer.
This makes textures ideal candidates for storing matrices.
How will we be using vertex shaders and fragment shaders to multiply two matrices?
As we have already learned, unlike CPU, GPU code works on multiple data at the same time. So, using the same CPU code, to our shaders will do us no good. What we will be doing is splitting our original task is smaller parts that are not interdependent.
So, how can we split matrix multiplication into smaller parts?
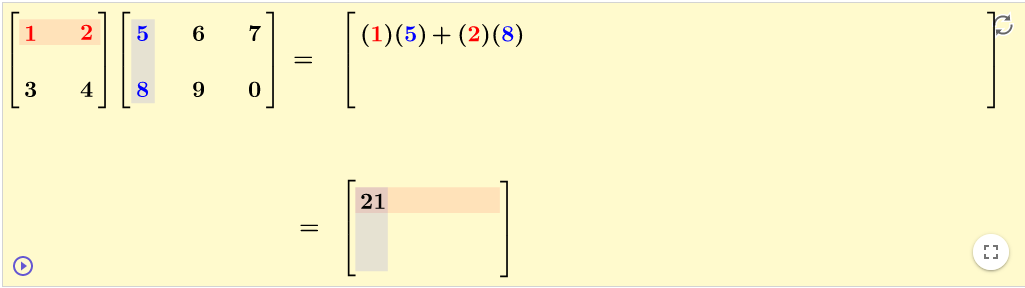
So, each shader will essentially be a dot product of a row and a column.
Our vertex shader and fragment shader will look like this:
const vs = `
#version 300 es

in vec4 position;

void main(){
  gl_Position = position;
}
`;

const fs = `
#version 300 es
precision highp float;

in vec4 position;

uniform sampler2D matA;
uniform sampler2D matB;

out vec4 outColor;

vec4 dotproduct(int rowIdx, int columnIdx, int rowLengthA){
    vec4 sum = vec4(0.0);

    for(int k = 0; k < rowLengthA; k++){
      vec4 elementA = texelFetch(matA, ivec2(k, rowIdx), 0);
      vec4 elementB = texelFetch(matB, ivec2(columnIdx, k), 0);
      sum += elementA * elementB;
    }

    return sum;
}

void main(){
  ivec2 texelCoord = ivec2(gl_FragCoord.xy);
  int rowIdx = texelCoord.y;
  int columnIdx = texelCoord.x;

  ivec2 dimA = textureSize(matA, 0);

  outColor = dotproduct(rowIdx, columnIdx, dimA.x);
}
Let's understand what is happening here. We will skip the vertex shader(stored in the vs variable) and look at the fragment shader(stored in the fs variable)
- The variable
matAandmatBof typeuniform sampler2D, are the textures storing the matrices A and B. Thesampler2Drefers to a 2D texture anduniformrefers to the fact that these variables will be the same across all invocations of the shaders. outColoris the output value of the pixel.- The
dotproductfunction computes the dot product of a row and a column. - The
texelFetchfunction is an in-built function that looks up a pixel from a texture. It takes in the texture as the first parameter andivec2(integer vector of dimension 2) as the second parameter. The third parameter is always 0. (don't ask me idk why)
That's pretty much it in the fragment shader, which is our main piece of code.
Let's go over the rest of the code that will create the textures and use the shaders to multiply two matrices.
To store our shaders and compile them for the GPU, we have to create a program:
const programInfo = twgl.createProgramInfo(gl, [vs, fs]);
For our fragment shader to work for all pixels of our output texture, we will create a rectangle covering our entire texture:
const arrays = {
position : { numComponents : 2,  data: [
    -1, -1,
     1, -1,
    -1,  1,
    -1,  1,
     1, -1,
     1,  1]
    }};

const bufferInfo = twgl.createBufferInfoFromArrays(gl, arrays);
twgl.setBuffersAndAttributes(gl, programInfo, bufferInfo);
Now let's create random data for our matrices.
const n = 4, m = 3;

function random(N){
const arr = new Float32Array(N);

for(let i = 0; i < N; i++)
  arr[i] = Math.random();

return arr;
}

const A = random(n*m);
const B = random(n*m);
Now let's store the matrices in a texture.
const textures = twgl.createTextures(gl, {
matA : {
  width : m,
  height : n,
  src : A,
  internalFormat : gl.R32F,
  format : gl.RED,
  minMag : gl.NEAREST
},
matB : {
  width : n,
  height : m,
  src : B,
  internalFormat : gl.R32F,
  format : gl.RED,
  minMag : gl.NEAREST
}
});
We have to tell the program where the textures are. The twgl.js lib makes it easy things easy for us. For now, let's store the textures in an array.
const uniforms = {
  matA : textures.matA,
  matB : textures.matB
};
We also have to create an output texture for the resultant matrix. But before we do that, we have to enable an extension, since rendering to texture with floating-point values is not enabled by default.
const ext = gl.getExtension("EXT_color_buffer_float");
Let's create our output texture and bind it to a framebuffer:
const matC = twgl.createTexture(gl, {
    width : n,
    height : n,
    internalFormat : gl.R32F,
    format : gl.RED,
    type : gl.FLOAT,
    minMag : gl.NEAREST
  });

  const attachments = [
    { format : gl.RED,
      attachment : matC,
      type : gl.FLOAT,
    }
  ];

const fbi = twgl.createFramebufferInfo(gl, attachments, n, n);
Now, we just have to set the input textures and render to the output texture.
gl.bindFramebuffer(gl.FRAMEBUFFER, fbi.framebuffer);

gl.viewport(0, 0, n, n);
gl.useProgram(programInfo.program);
twgl.setUniforms(programInfo, uniforms);
twgl.drawBufferInfo(gl, bufferInfo);
At this point, our output texture will contain the resultant matrix, we can read the texture as follow:
const pixels = new Float32Array(n*n*4);
gl.readPixels(0, 0, n, n, gl.RGBA, gl.FLOAT, pixels);

const results = new Float32Array(n*n);
for(let i = 0; i < n*n; i++)
results[i] = pixels[i*4];
Let's also display our matrices in the window.
displayMatrix(A, n, m, "A");
displayMatrix(B, m, n, "B");
displayMatrix(results, n, n, "C")

function displayMatrix(mat, N, M, tag){
    log(`${tag}:\n${createMatString(mat, N, M)}`);
}

function createMatString(mat, N, M){
    let str = "";
    for(let i = 0; i < N; i++){
      for(let j = 0; j < M; j++){
        str += `${mat[i * M + j].toFixed(5)} `;
      }
      str += '\n';
    }

    return str;
}

function log(...args) {
    const elem = document.createElement('pre');
    elem.textContent = args.join(' ');
    document.body.appendChild(elem);
}
Voila, we have multiplied two matrices using webgl. Yay!
Here's the link to the complete code.
References
- WebGL2 Fundamentals is a good resource for learning about webgl in general.
- WebGL2 GPGPU is an excellent source for learning about general purpose programming using webgl. This is where I began.
- LearnOpenGL